|
||||||||||||||||
| Practice session |
|
|
|
|
|
|
Exercises
|
|
||||||||
| The Shape generator: cuts |
||||||
| The objective of this practice session is to create a double puzzle with the pieces defined by the option Cuts in the shape generator. |
||||||
| To take part in this practice session you will need the files house.jpg and backgroundhouse.jpg both found in the course material. Start up JClic author and open the project module2.jclic.zip. Go to the menu Media Library and using Now go to the menu Activities and click on Open the menu Panel. Click on the button Image Drop down the menu Select type of shape generator from the panel and choose Cuts. This type of shape generator is different to the others. In practice session 1 of this module you worked with the option Jigsaw with curved unions, which has the same options and follows the same procedure as those with rectangular and triangular fitting edges. The option Cuts is completely different. Here you will work with some basic tools. Once you have selected the option Cuts you will see that the image in the panel is no longer divided into pieces. You have to create the pieces of the puzzle from the window Properties of the shape generator. Click on the button
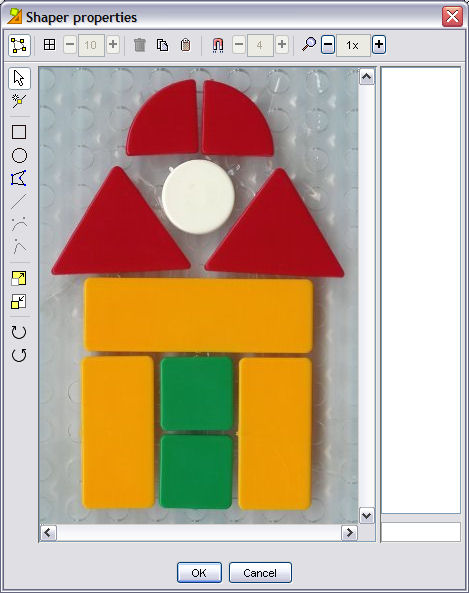
This window contains the tools for cutting the image into shapes which will become the pieces of the puzzle.
Once you have drawn the first piece, you will see that on the right, number 0 appears. Each time you draw a piece, a number will appear. To work with the pieces later you must select them from here. The chosen cut will be blue and the points that mark the limits will be marked with larger squares. Choose the tool for rectangles Select the tool for polygons With the same tool make a cut which has the shape of a quarter of a circle.
Once you have drawn the 4 cuts, confirm with OK and return to the panel where you have the image with the cuts i.e. the pieces of the puzzle.
Test the activity with Close the test window to return to JClic author. Click on the button Style on the panel and make the Colour of inactive state white. Tick the option Border on the panel and from the window Style enlarge the thickness of the pieces a little so they become more noticeable.
Go to the menu Window. Change the background colour of the window to white. In this way the pieces you have cut out will show up more, but not the shape of the cuts in panel B. Click on Image in the main window and select backgroundhouse.jpg. Tick the option mosaic and in this way the image will be repeated until all of the main window is filled. If you wish you can write messages. The aspect of the activity should be similar to this.
Try out the activity again from the test window with the button |
||||||
|
|
||||||
| |
||||||


